COLOUR GRADING ENHANCEMENT
by Scott Lockhart
on 25/04/2023
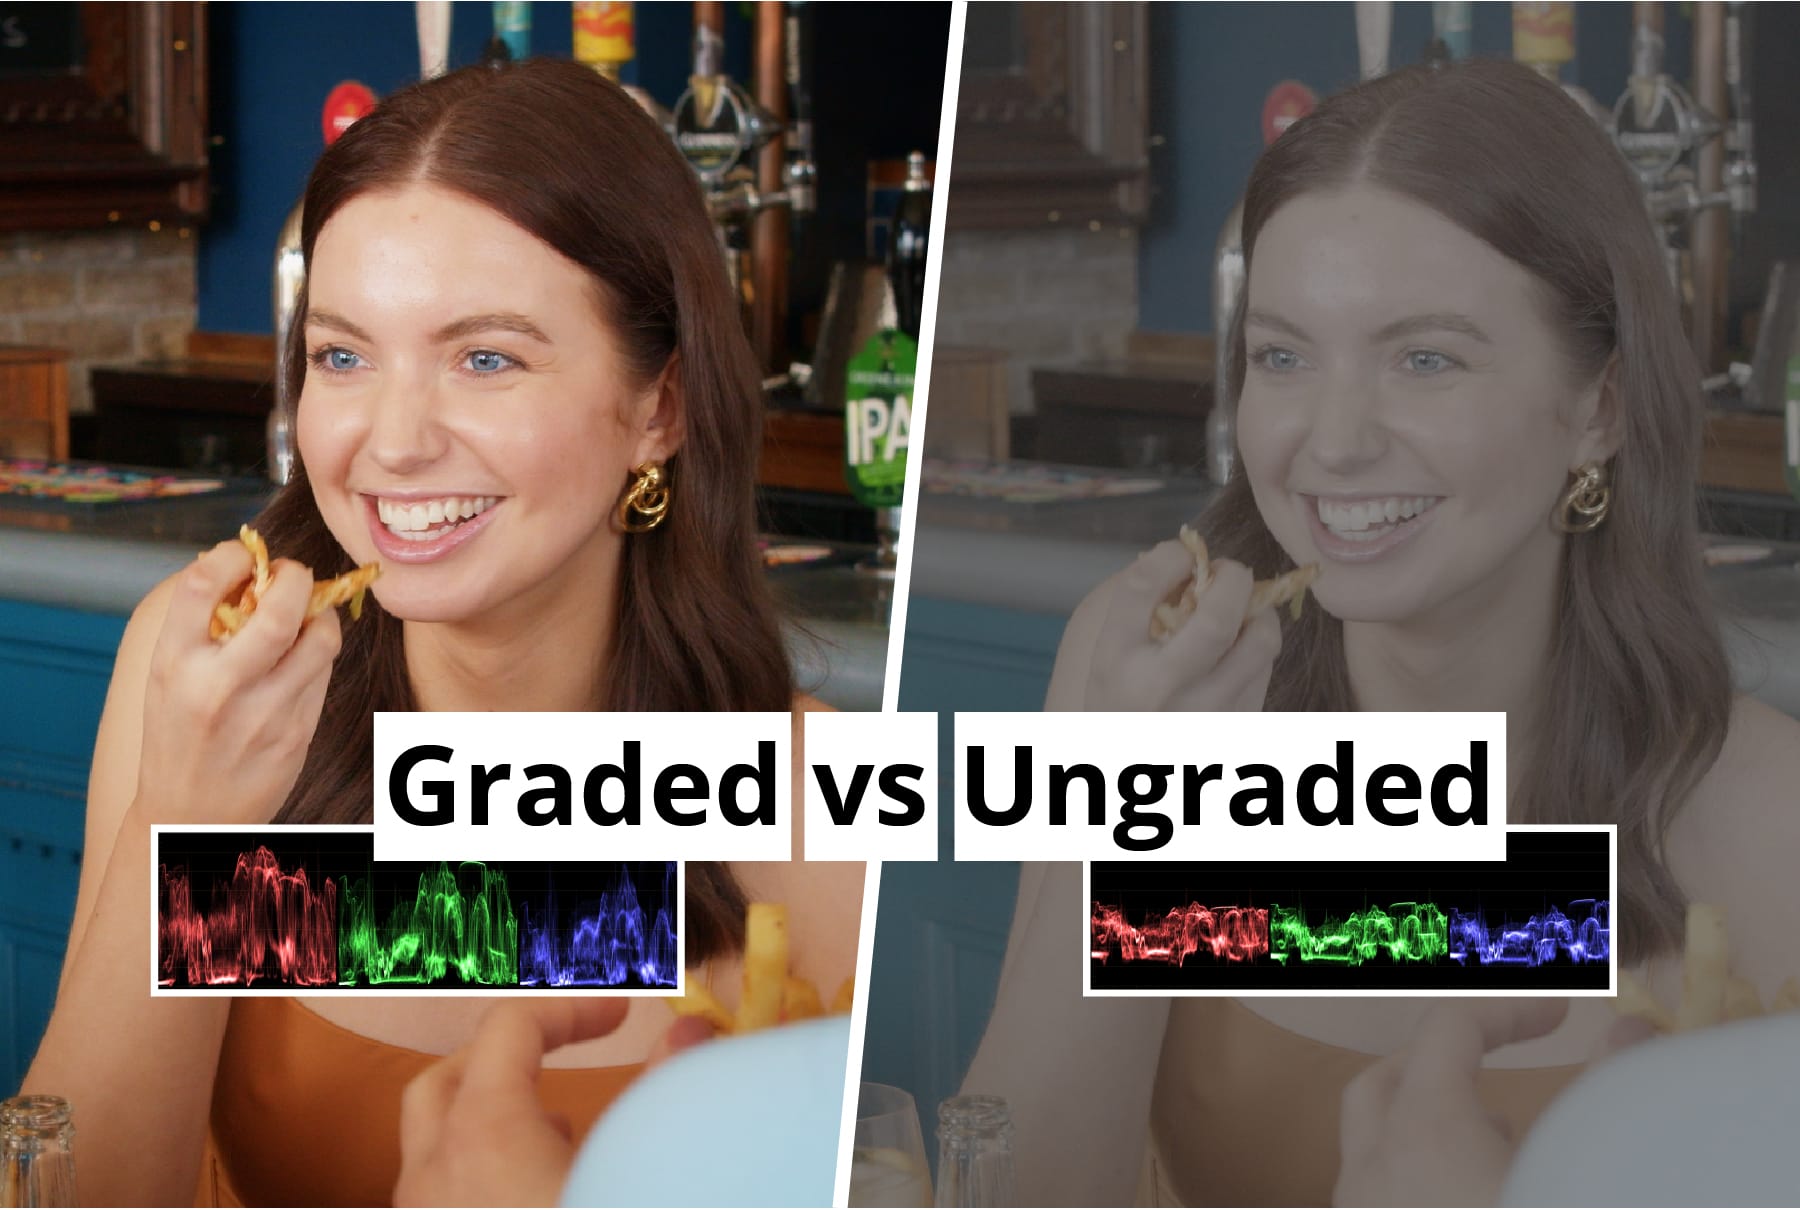
There are so many elements that go into creating a professional video, from storyboarding, shot listing, lightning, filming, set dressing, art direction, food styling, audio and editing. But one of the final stages to give a video that professional polished feel is the colour grading.
Colour grading is an important process as it helps to visually enhance a story. It gives you the ability to set the mood or the tone of the piece of media you’re creating, you can give context to environments, play with emotions, and evoke desire which is so important in advertising. Effectively, it’s a visual form of communication in which you convey an intended message to the audience or consumer.
We’ve worked with Greene King and photographer Thom Bartley on several different projects over the years and they are always great projects for getting interesting footage. The aim is always to get that feeling of good friends and family enjoying great food. Lighting for filming is usually quite challenging in a pub environment, so a good lighting set up is key to creating good deliverable footage ready for grading.
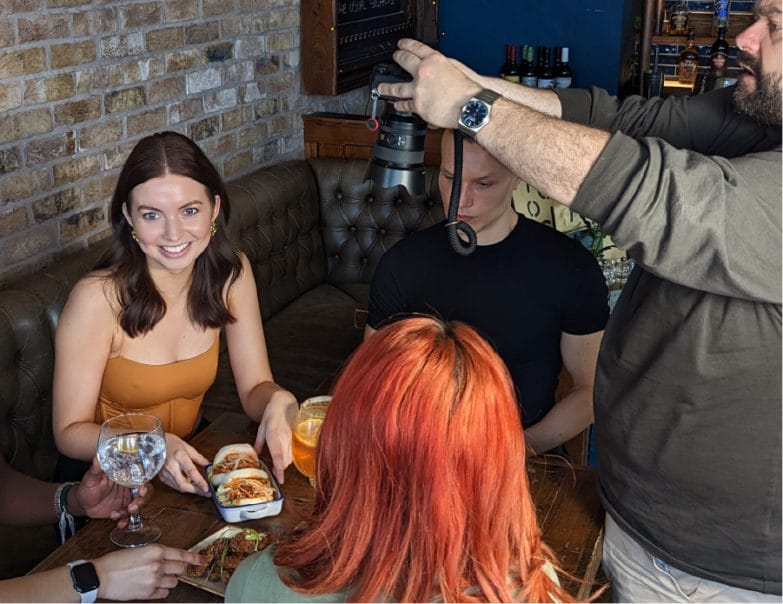
Dim, warm, ambient lights are little to no use in lighting a scene, but they are what create the feel of an inviting pub. They will also be a huge consideration when setting up lights and grading the footage. The challenge is finding that balance of the warm ambient light of the pub, and the cool natural light from daylight LED panels to balance skin tones and bring out natural colours in the food.
Colour grading really starts the moment you are stood behind the camera looking at the scene, noticing the warm Edison bulbs that you will later add a glow to in the grading process, picking out the colourful elements of a dish that you want to stand out, or just seeing where the specular highlights are and exposing accordingly.
In summary colour grading can be very time-consuming and requires a very specific set of skills, as well as needing specialised colour grading software which can be costly with a very steep learning curve. The art of grading lies in subtlety, and that can very easily get forgotten. Over correcting footage can be distracting and have the complete opposite intended effect where viewers are taken out of the story or feel a product doesn’t look genuine or real.
Colour grading is such an integral part of delivering a professional final product. Not only will it visually enhance the footage, but it enhances the story you’re trying to tell, whilst at the same time establishes your brand with a distinct style that is tailored to resonate with your target audience.
Why presets (LUTS) aren’t always the answer.
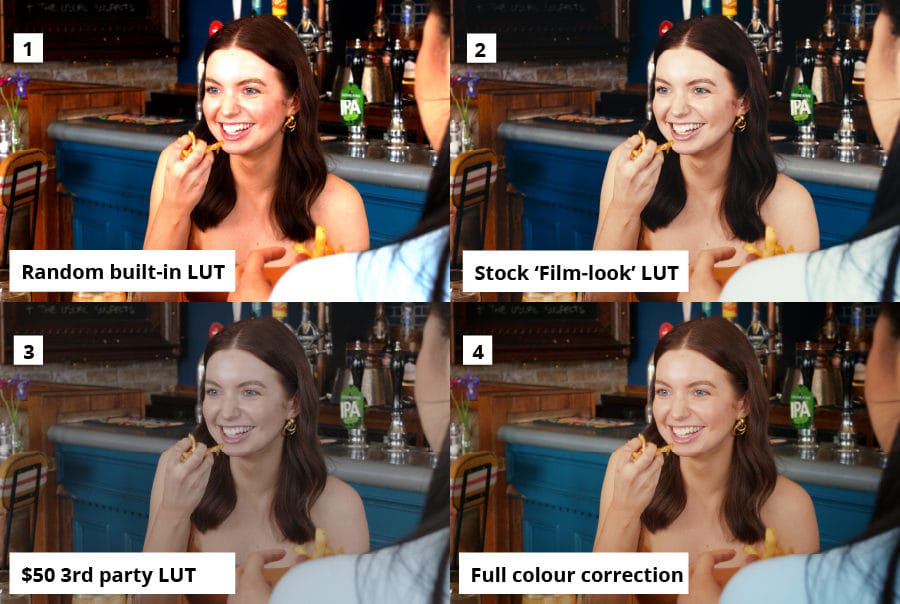
A preset colour grade also known as a LUT is like an Instagram filter. Sometimes they work, sometimes they don’t. They can be great time-savers but limit how creative you can get with the footage.
Image 1: Clearly doesn’t work with this footage, everything from the exposure of the image to the skin tones have been pushed to the limit.
Image 2: In some scenarios this kind of look would work, but when the footage is meant to feel warm, summery, and energetic this preset doesn’t work.
Image 3: This LUT works as a good starting point, but is by no means a finished look. Very desaturated and dull.
Image 4: This is the look I wanted for this footage, warm, natural skin-tones, vibrant and bright footage for an inviting, friendly, summery look.
If technical details are a point of interest, a typical project would go as follows:
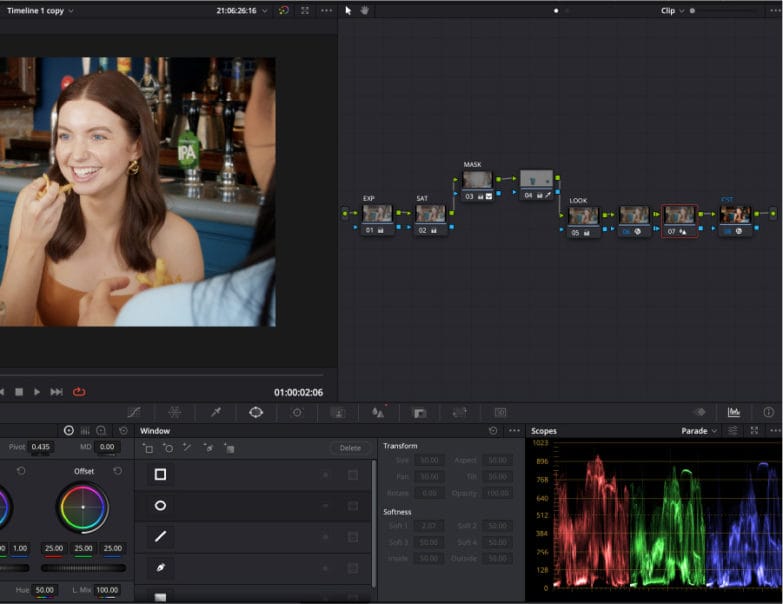
Receive a rough cut of a video either still in RAW format, or as proxy media that I can relink to the RAW footage; at Eat With Your Eyes we work with BRAW which is the RAW format for Black Magic cameras. Working in RAW gives so many benefits when starting the colour correction process as none of the white balance or ISO information is burnt into the footage, so I can easily adjust clips to match thoughout the video.
Working in Davinci Resolve, I will set my project to be colour managed by Davinci Resolve for a REC .709 timeline, this only works if you’re working with RAW footage that has the relevant metadata for Davinci Resolve to know what colour space the footage was shot in, gamma settings and what camera was used. If the video was shot on several different cameras, then I would manually colour manage the project with CST nodes (Colour space transform) in the grading process and manually tell it all the relevant information for it to accurately convert the colour information.
After correcting the white balance, exposure and setting up the project for accurate colour conversion I will start grading the footage. Typically, I will set up 5 nodes to start.
Noise reduction > Saturation > Exposure / Contrast > Parallel Mixer Node > Sharpening
These are the basics to get a good look, but occasionally more creative effects will get added depending on the project.
Bio: Scott Lockhart – Graphic Designer
An enthusiast for all things creative, whether it’s graphic design, videography, photography or even writing music.


